Pages are the core of your app's user interface in Devize. Each page represents a screen or view, such as a homepage, profile page, or admin dashboard. The Pages feature also defines the routing structure of your app, allowing for straightforward navigation and powerful nested routing.
Defining Routes for Pages
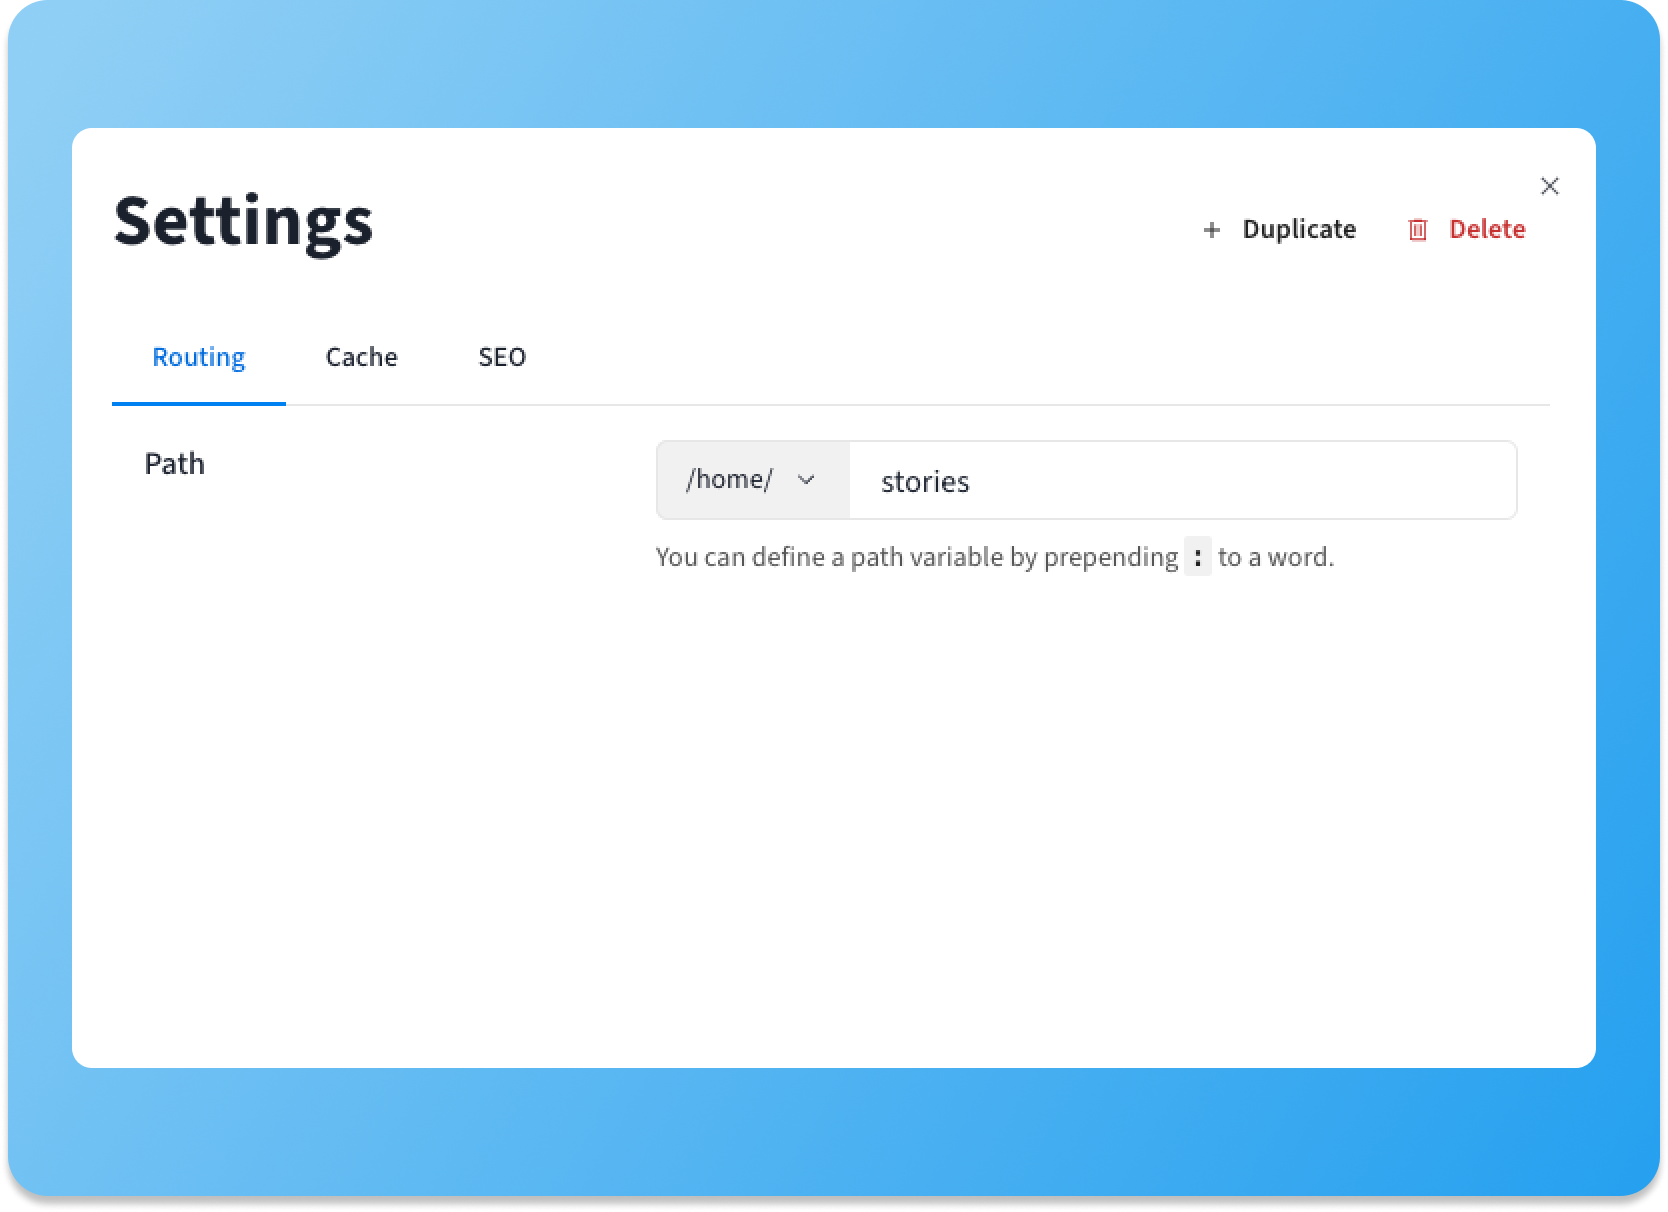
When creating a page in the Canvas Tab, you define its route. A route is the URL path that maps to a specific page in your app. For example, a route /dashboard might point to your main dashboard page.
Create a Page: Add a new page and give it a name (e.g., "Dashboard").
Set the Route: Define a route like /dashboard for the page.
Parent Routes and Nested Routing
Devize supports nested routing, a powerful feature for organizing your app into hierarchical routes and shared layouts.
Adding a Parent Route
When setting up a route, you can choose a parent route. For example:
Parent Route: /dashboard
Child Route: /dashboard/settings
By assigning a parent route, the child page becomes nested under it. This helps create clear and intuitive navigation paths in your app.
Using an Outlet Layer
When working with nested routes, the parent page must include an Outlet Layer. The outlet layer acts as a placeholder where the child page content is displayed. Without it, child pages won't render within the parent page's layout.
Here’s how to set it up:
Open the parent page in the Canvas Tab.
Add an Outlet Layer to the appropriate position within the page layout.
Note: Any content outside the outlet layer remains static on the parent page, making it perfect for shared headers, sidebars, or navigation elements.
Lets use the KidTales app below as an example. This app uses a pretty common design of a shared header and side bar. When the user clicks on links in the sidebar, only the content in the center changes (outlined in blue in the second image)
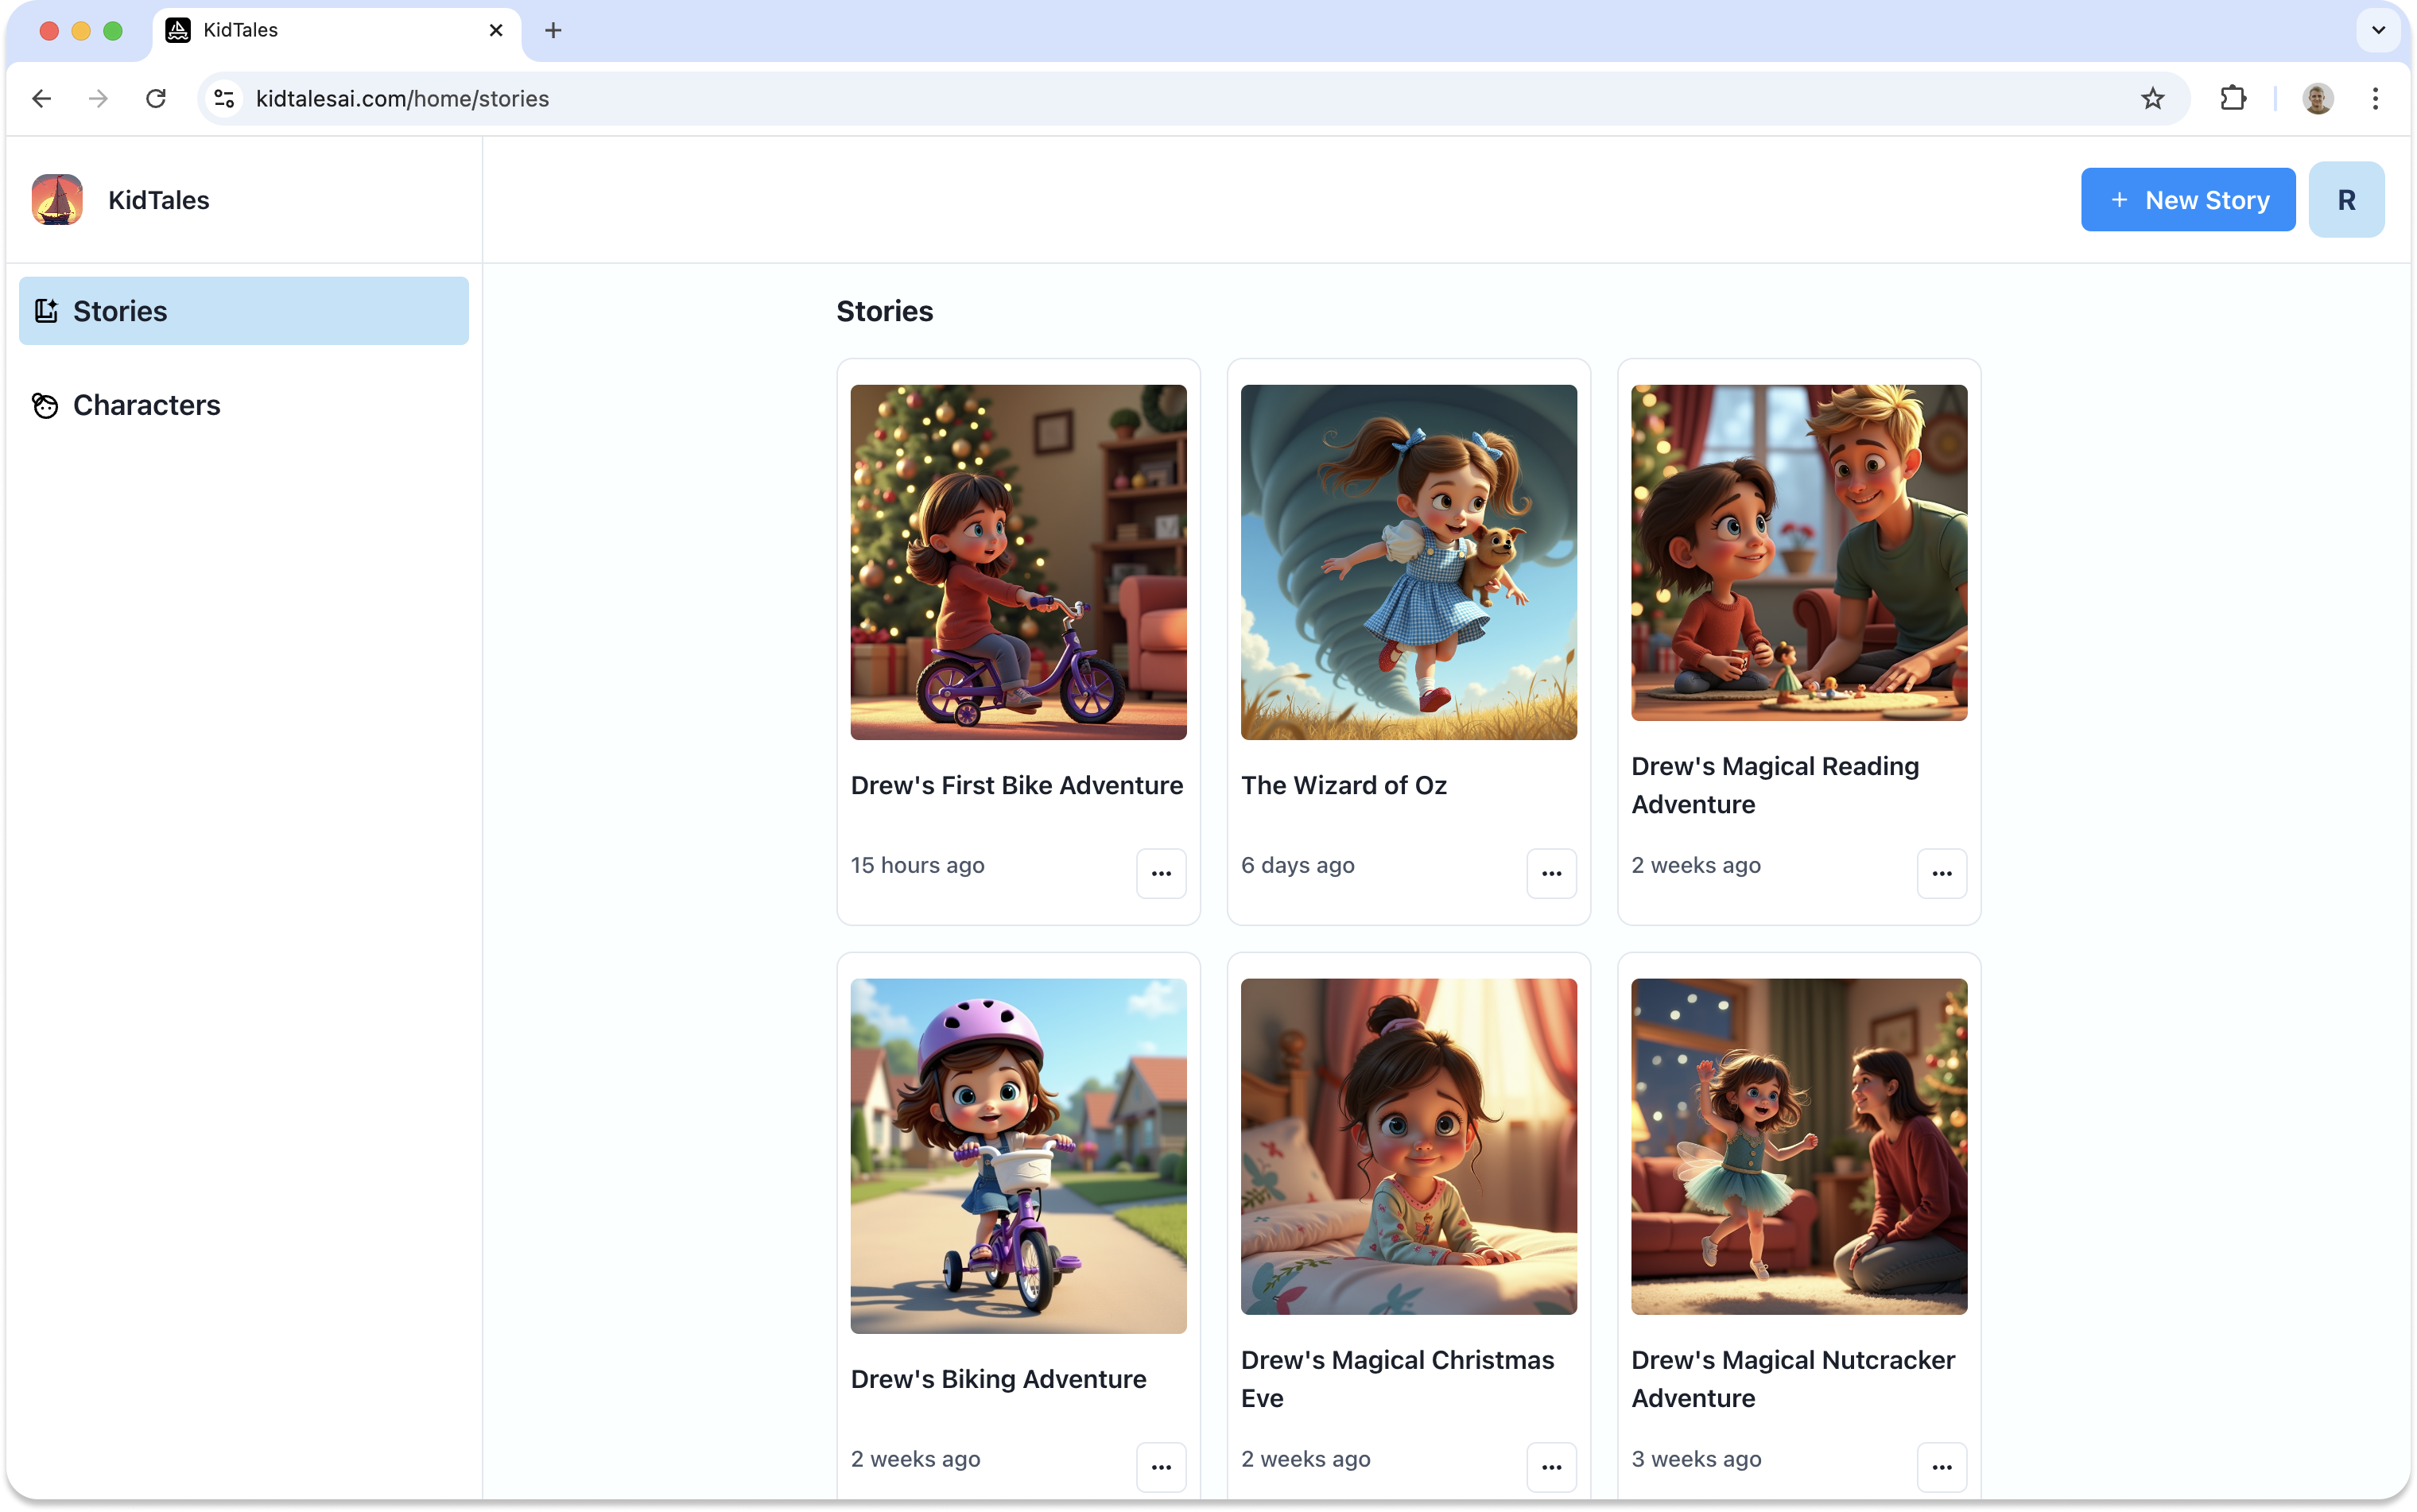
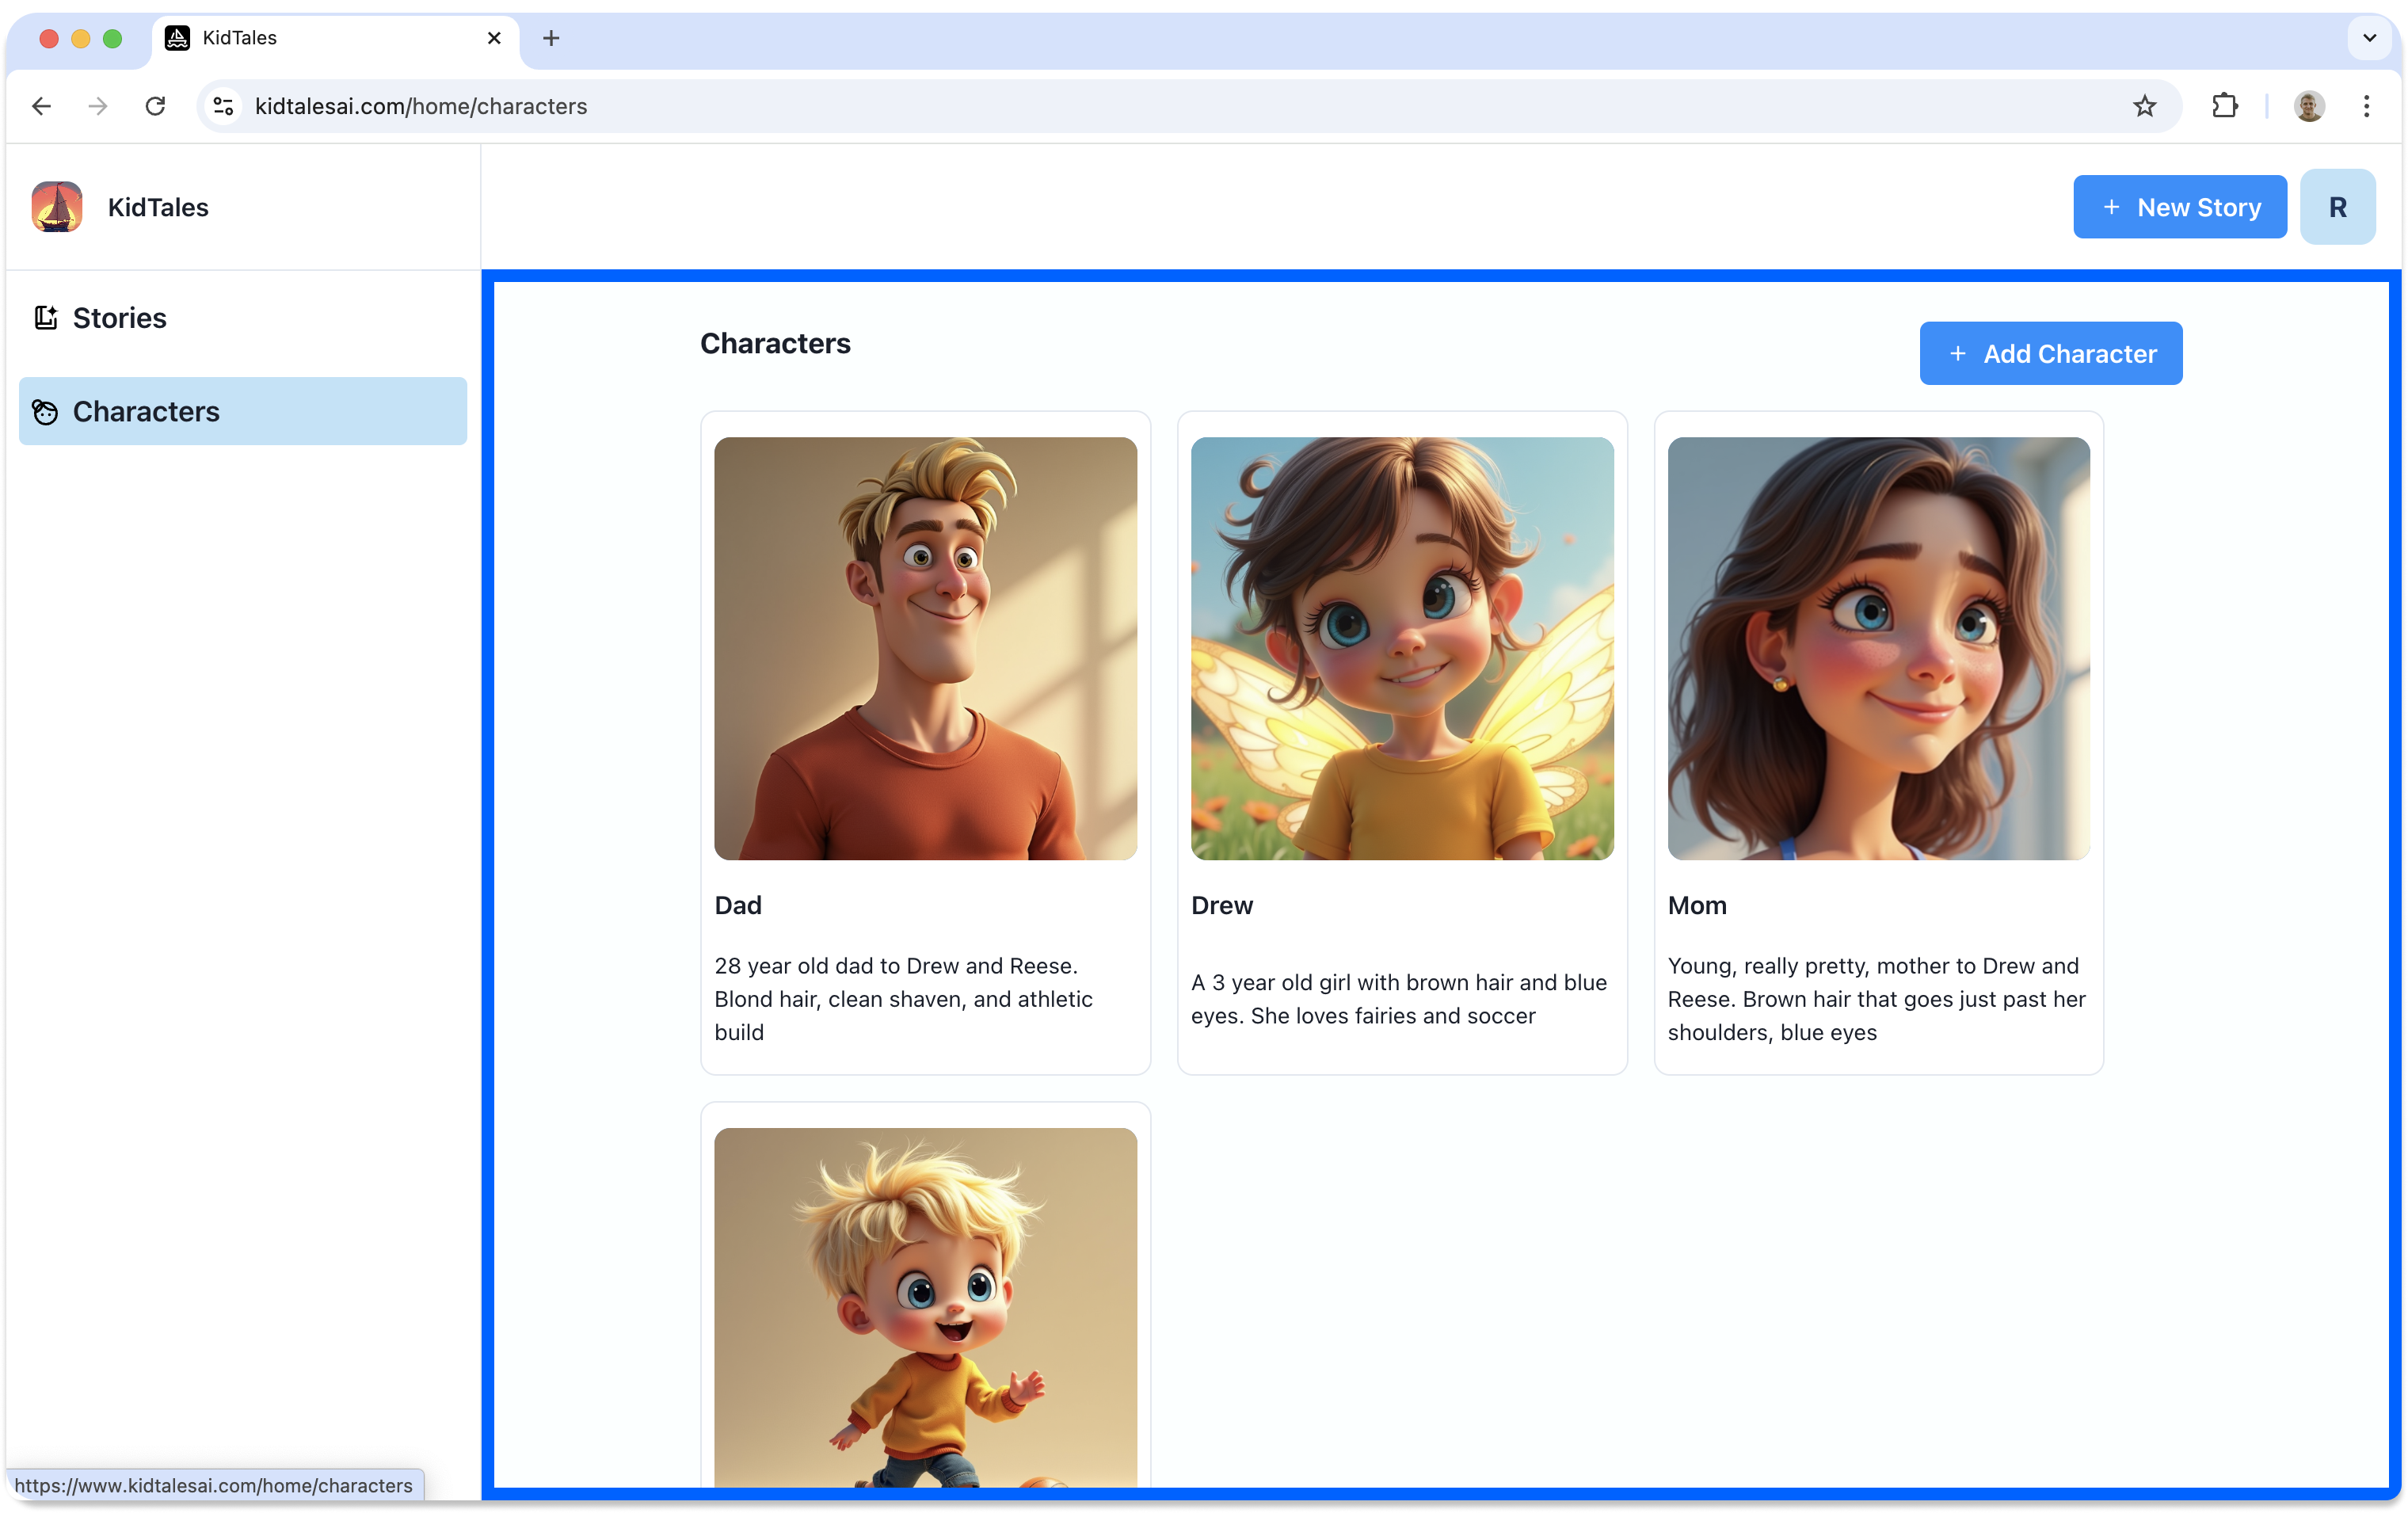
If you're eyesight is good enough, you may have noticed the URL pattern as well
The first page is /home/stories
The second page is /home/characters
In Devize, this was built with a page at /home as the parent route and the two characters and stories pages both selected home as their parent route
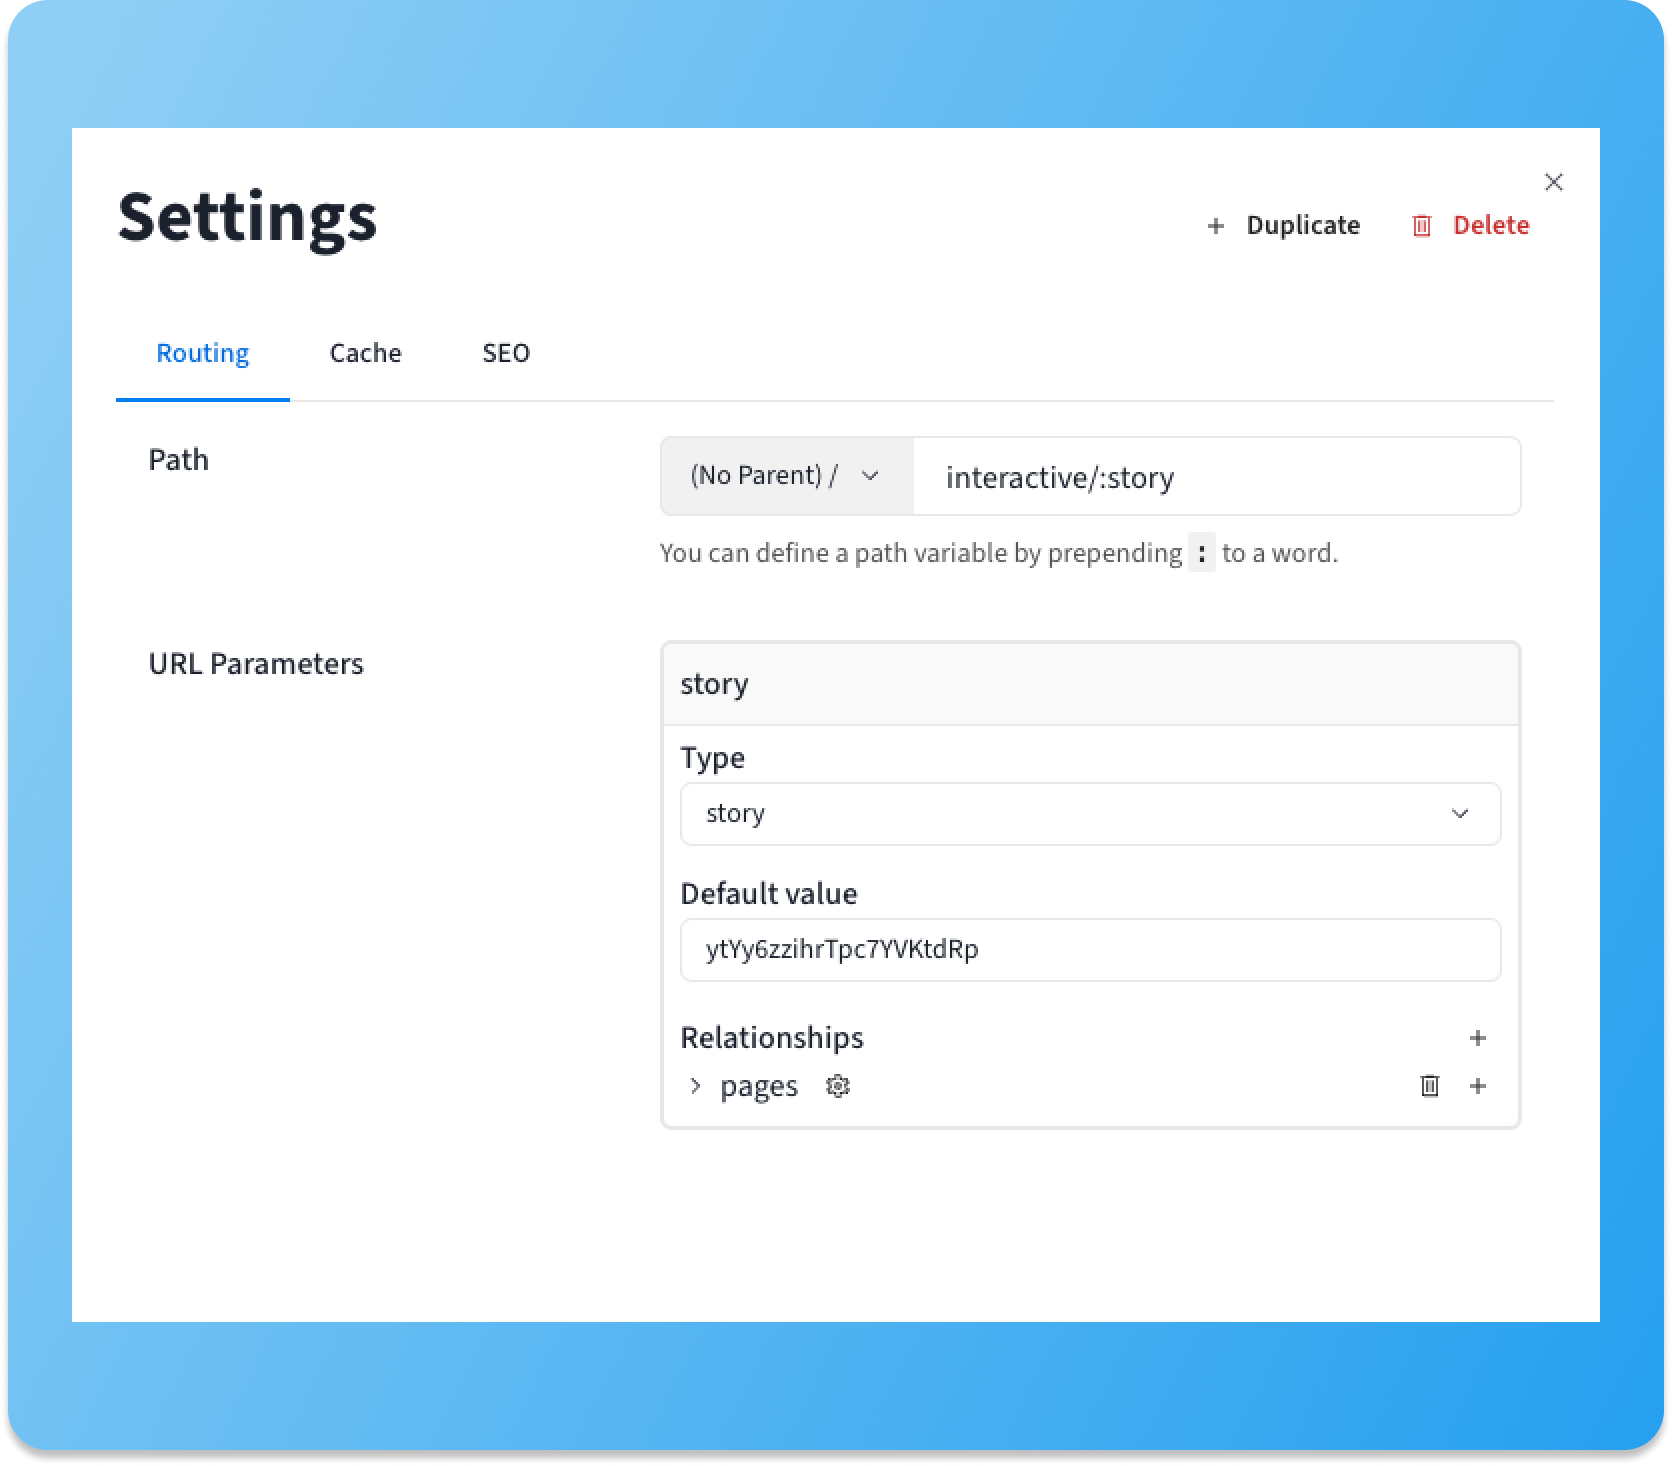
Route Parameters
Route parameters allow your pages to display dynamic content based on the URL. They are essential for creating personalized user experiences, such as viewing a specific user’s profile or displaying details for a particular item. Parameters are defined directly in the route and accessed within your workflows and layers.
Setting Up Route Parameters
To add parameters to a route:
Define a Parameterized Route
1. When creating or editing a page, include a parameter in the route using a colon (:).
Example: /users/:userId
In this example, :userId is the parameter.
Pick the type for the parameter
You can leave it as text, or pick a table from your database
When picking a table from your database, the value will always be the id of a row
Give it a default value (optional)
Passing a default value makes it convenient when previewing your app
Using Route params
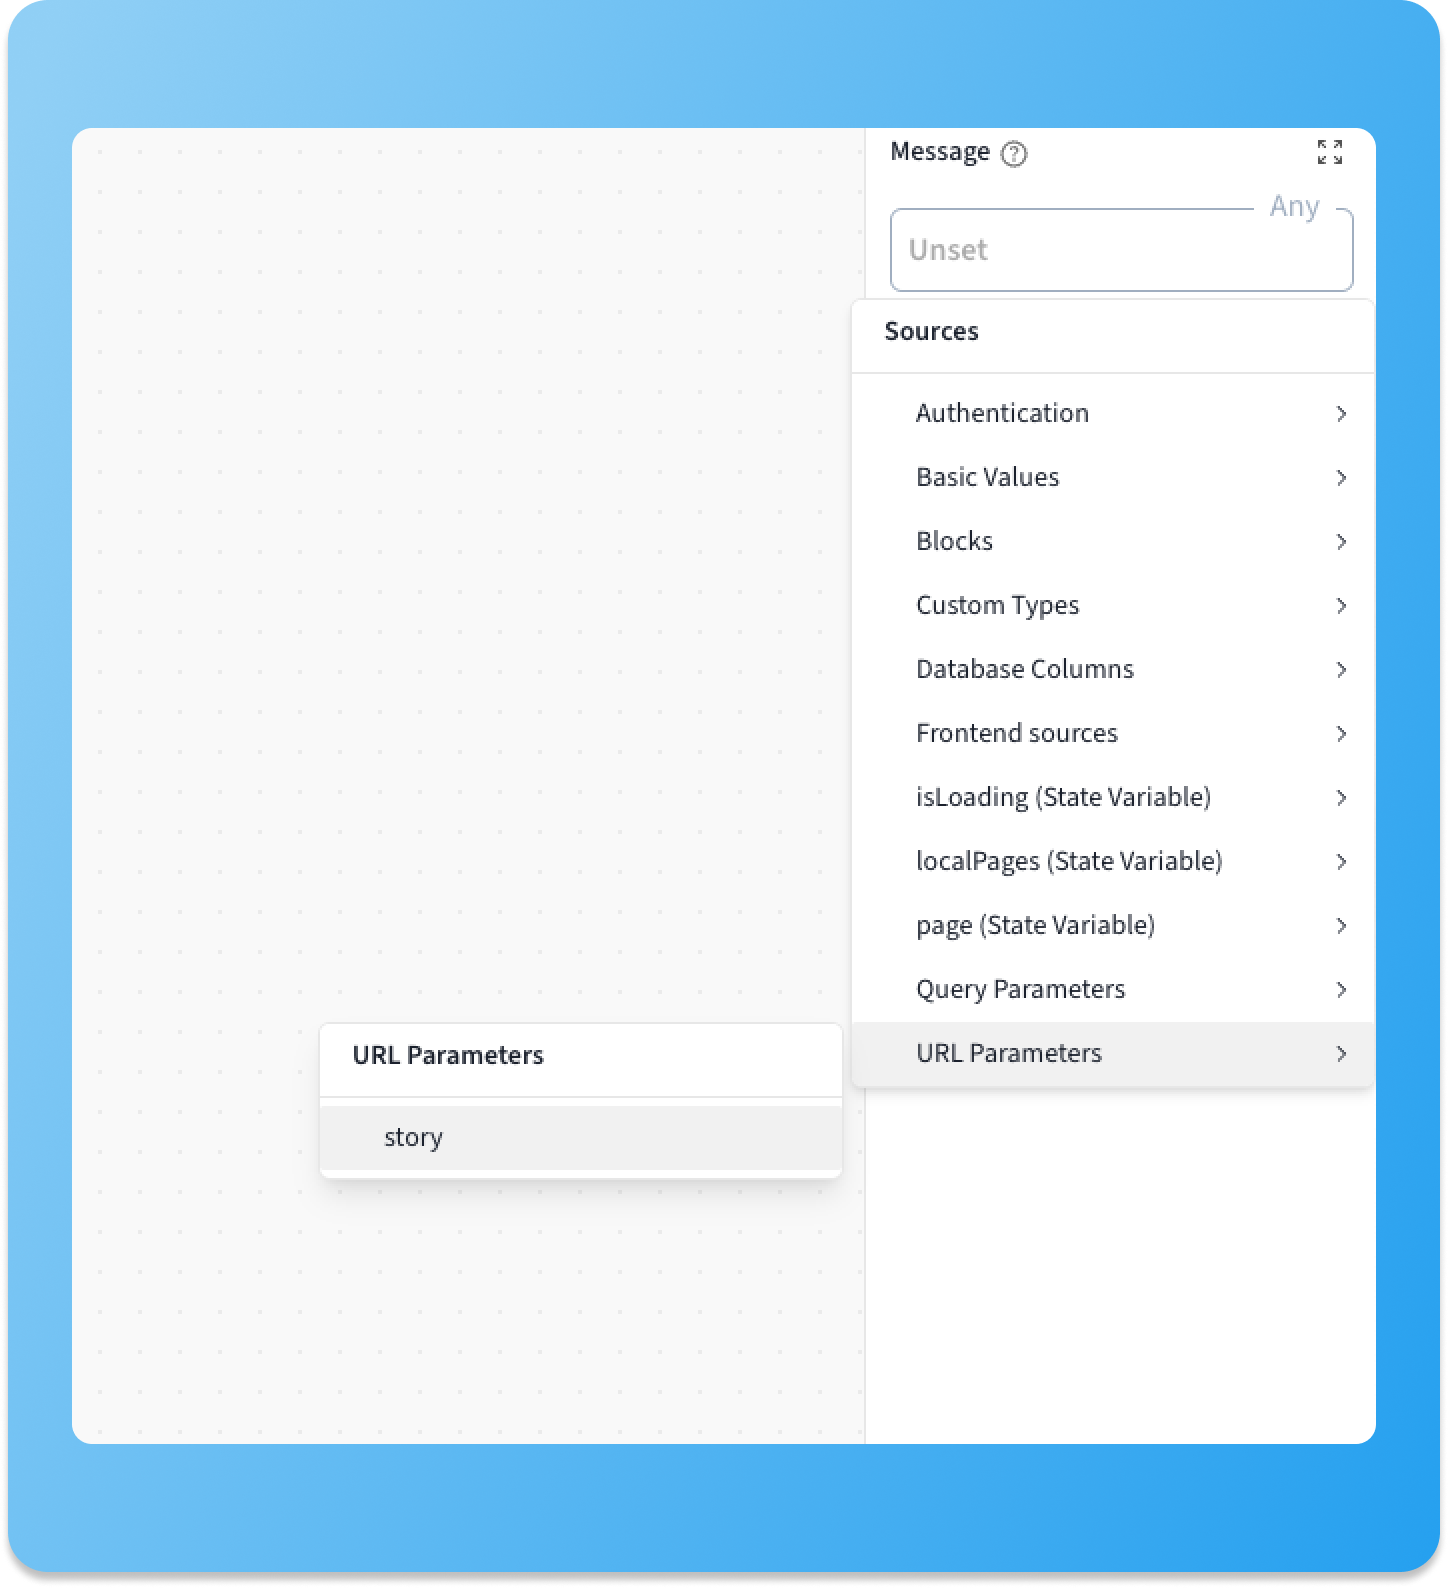
After you have defined a route param, there will be a new source on your page that you can reference in pages and in workflows
If you leave your URL parameter as text, you can still use it in conjunction with your preload workflow to load data - For example, wanting to load users by a username instead of by their Id